
Receipt organisation
How to Organise Receipts in Google Drive—and Track Them in Google Sheets
Set up a simple receipt folder and expense tracker using Google Drive and Google Sheets, with a repeatable routine for reviewing and finding records.
· 4 min read
A receipt is useful only if you can connect it to the expense later. This guide gives you a straightforward way to store the file in Drive and its details in Sheets.
1. Create one home for receipts
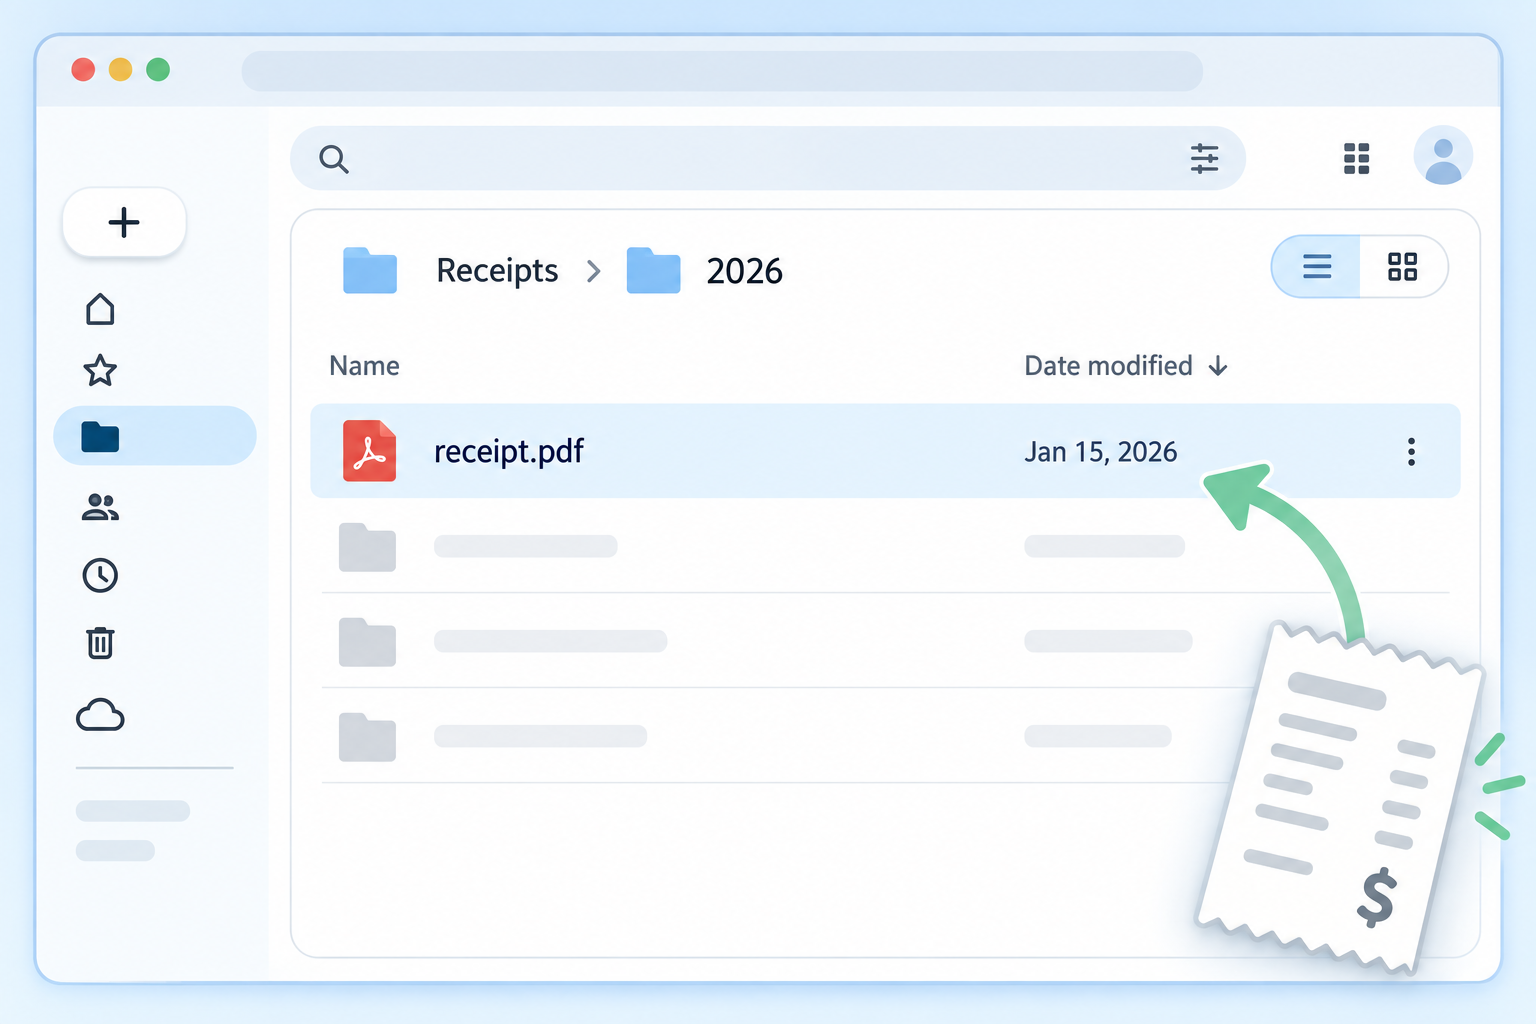
In Google Drive, create a folder called Receipts. Inside it, make a folder for each year. Add month folders only if the annual folder becomes hard to scan. A small structure that you use consistently beats an elaborate one you abandon.
For example, a receipt might live here:
Receipts / 2026 / 2026-09-14_coffee-shop_18-50.pdf
Use a file name with the date, merchant, and amount. Keep the original receipt readable; a clear photo or PDF is more useful than a perfect file name attached to an unreadable image. Check local record-keeping rules before discarding paper originals.
2. Give every expense one row in Sheets
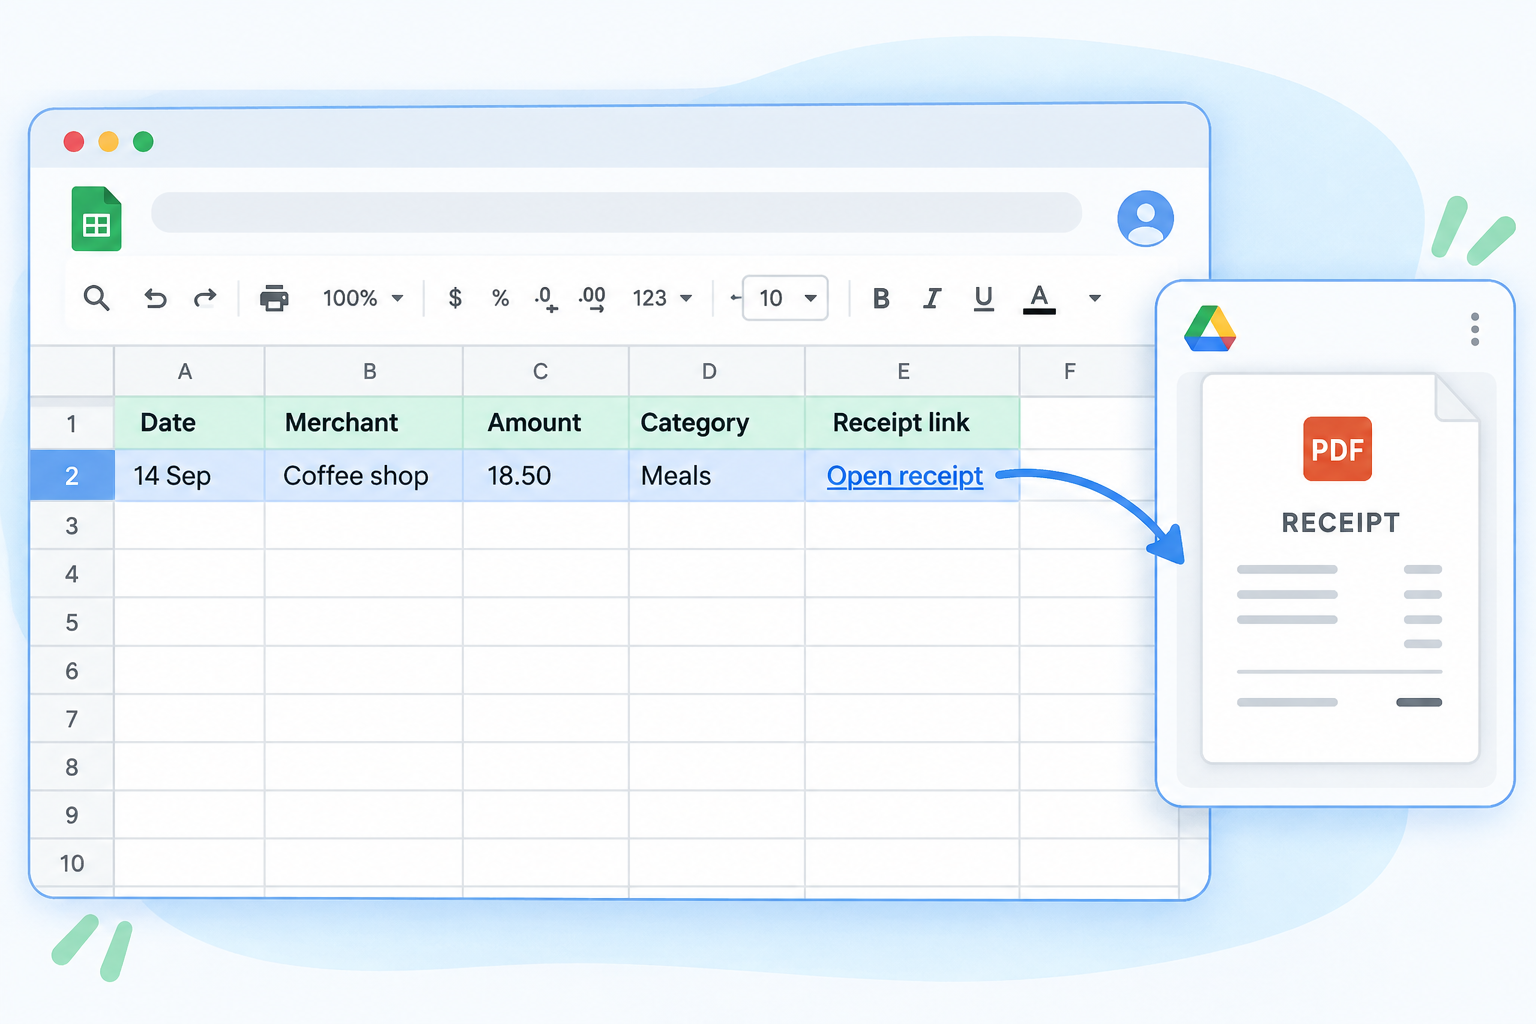
Create a Google Sheet with these columns. One row per transaction makes sorting, filtering, and reviewing much easier than putting several purchases into one cell.
- Date: the purchase date in a consistent format.
- Merchant: the supplier shown on the receipt.
- Description: what you bought and why you need to track it.
- Category: a consistent label, such as travel or software.
- Amount and currency: the total paid and its currency.
- Receipt link: a link to the matching file in Drive.
- Notes: business purpose, reimbursement, or other context.
Keep tax treatment in a separate, reviewed field if you need it. A category or receipt alone does not establish whether an expense is deductible.
3. Link the row to the actual receipt
Upload the receipt to its Drive folder, copy its link, and paste that link into the row’s Receipt link cell. Use Drive permissions that match who needs access. A file name in a spreadsheet is helpful, but a working link saves the search later.
If a receipt covers several expenses, decide whether to split the amount into separate rows or keep a single row with a clear note. Whatever you choose, avoid accidentally counting the same purchase twice.
4. Make review a short, repeatable habit
- Collect paper and email receipts in one place during the week.
- Upload or photograph them while the purchase is still familiar.
- Add the Sheet row and paste the matching Drive link.
- Compare rows with your payment records and mark missing receipts for follow-up.
- At month end, check that links open and notes explain unusual purchases.
This routine is especially valuable before handing records to an accountant or preparing a tax return. Requirements for evidence and retention vary by location and situation, so check the rules that apply to you.
See how Gexpense scans receipts into Drive and Sheets.
If you are estimating Australian tax, try the free salary and sole trader tax estimator. It uses reviewed claim amounts.